
How to Turn an Exhibition Brief Into a 3D Stall Design: A Worked Example
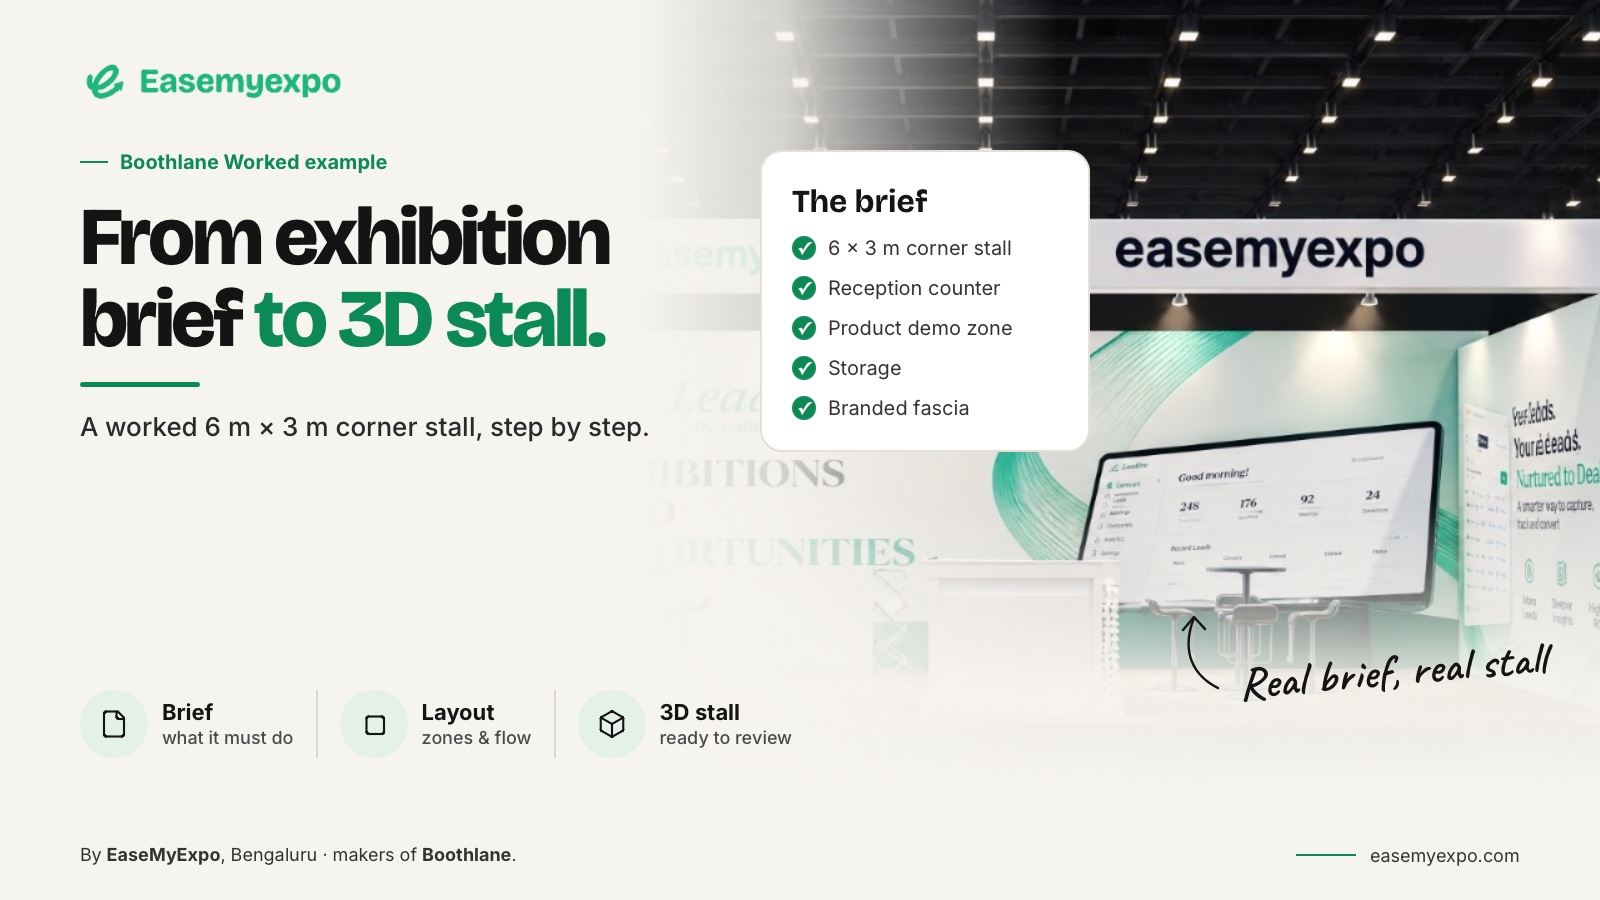
Turn an exhibition brief into a 3D stall by translating every important requirement into a spatial decision. Start with the objective, booked footprint and required activities. Place the largest constraints first, compare a small number of layout options and record the decisions that need approval before developing detailed visuals.
The difference between a brief and a design is not just a picture. It is a set of choices about what visitors and staff will do in the space.
At a Glance
Translate the brief into priorities, constraints and spatial decisions. Compare options that solve the visitor experience differently, not merely different colour schemes.
The fictional corner-booth example below shows how a requirement becomes a model, a review question and an approved next step.
What Does a Useful Exhibition Brief Look Like?
Consider this illustrative brief for a fictional product company:
A 6 m × 3 m corner stall with one demonstration counter, two display units, a small conversation area, concealed storage and clear branding on both open approaches. The goal is to help visitors understand the product and request a follow-up demonstration. These are invented requirements for this worked example. They are not a customer case study, measured result or approved layout for a particular exhibition. The booked floor plan and event manual should provide the actual dimensions, open sides and venue restrictions. Industry guidance can help during planning, but the documents supplied by the organiser should always govern the final project.
Source: Freeman – Exhibit Stand Design Best Practices
How Do You Separate Requirements From Preferences?
Start by separating what the stall must have from what would simply be nice to have. If the brief says a demonstration counter and concealed storage are essential, treat them as required functions. A specific decorative fascia shape, finish or furniture style may be a preference unless there is a clear reason it cannot change.
This becomes important during revisions.
A designer may need to adjust a preferred fascia shape to preserve access, improve visibility or fit the required display units. Without clear priorities, every element can appear equally important and the design becomes harder to resolve. Unknown information should also remain visible. Product dimensions, stock volume, screen content, staffing and equipment requirements can all affect the layout. Instead of guessing, record those unanswered questions and assign them to the person who can provide the information before layout approval.
How Does the Brief Become a First 3D Layout?
Start with function before appearance. Place the demonstration zone where a visitor can stop without blocking someone else entering the stall. Position storage where staff can access it without repeatedly crossing the main visitor interaction area. Place the conversation area where it does not hide the main product display or interfere with circulation.
If the final furniture or equipment model is unavailable, use simple placeholder objects with the correct dimensions. Clearly identify what each placeholder represents so it is not mistaken for an approved piece of furniture.
At this stage, the main question is simple:
Do all the required functions work together inside the available space?
Do not begin by finding the most dramatic camera angle. Begin by checking the actual layout from several positions.
How Should Two Design Options Differ?
The difference between design options should be meaningful. For example, Option A could prioritise a demonstration area that is clearly visible from the main aisle. Option B could prioritise a quieter conversation area with the displays arranged differently.
Both options should still meet the essential requirements of the brief. Avoid presenting several versions that only change colours while the real unresolved question is circulation, product placement or visitor flow. The purpose of creating options is to help the client choose between different approaches, not simply to increase the number of renders.
In Boothlane by EaseMyExpo, designers can work on an editable 3D stall and customise the fascia, furniture, layout and brand treatment around the selected direction. The design decisions remain controlled by the user. Rendering comes after those decisions have been represented in the model.
How Do You Translate the Brand Into the Stall?
Decide what a visitor should recognise first. Is it the company name? The product? A campaign message? Once that hierarchy is clear, place each message according to how visitors will approach and move around the stall.
Use the actual logo and artwork wherever possible so the design reflects the real proportions, letterforms and branding. In our fictional example, the corner stall has two open sides. That means there are two important arrival views. Review the branding from both directions. A sign that looks perfect in the main render may be difficult to see from the second aisle.
Digital material samples should also be treated as visual references rather than final construction specifications. The design should communicate the intended appearance clearly, while the responsible fabrication team selects and approves the actual materials used in production.
What Should the Client Approve at Each Stage?
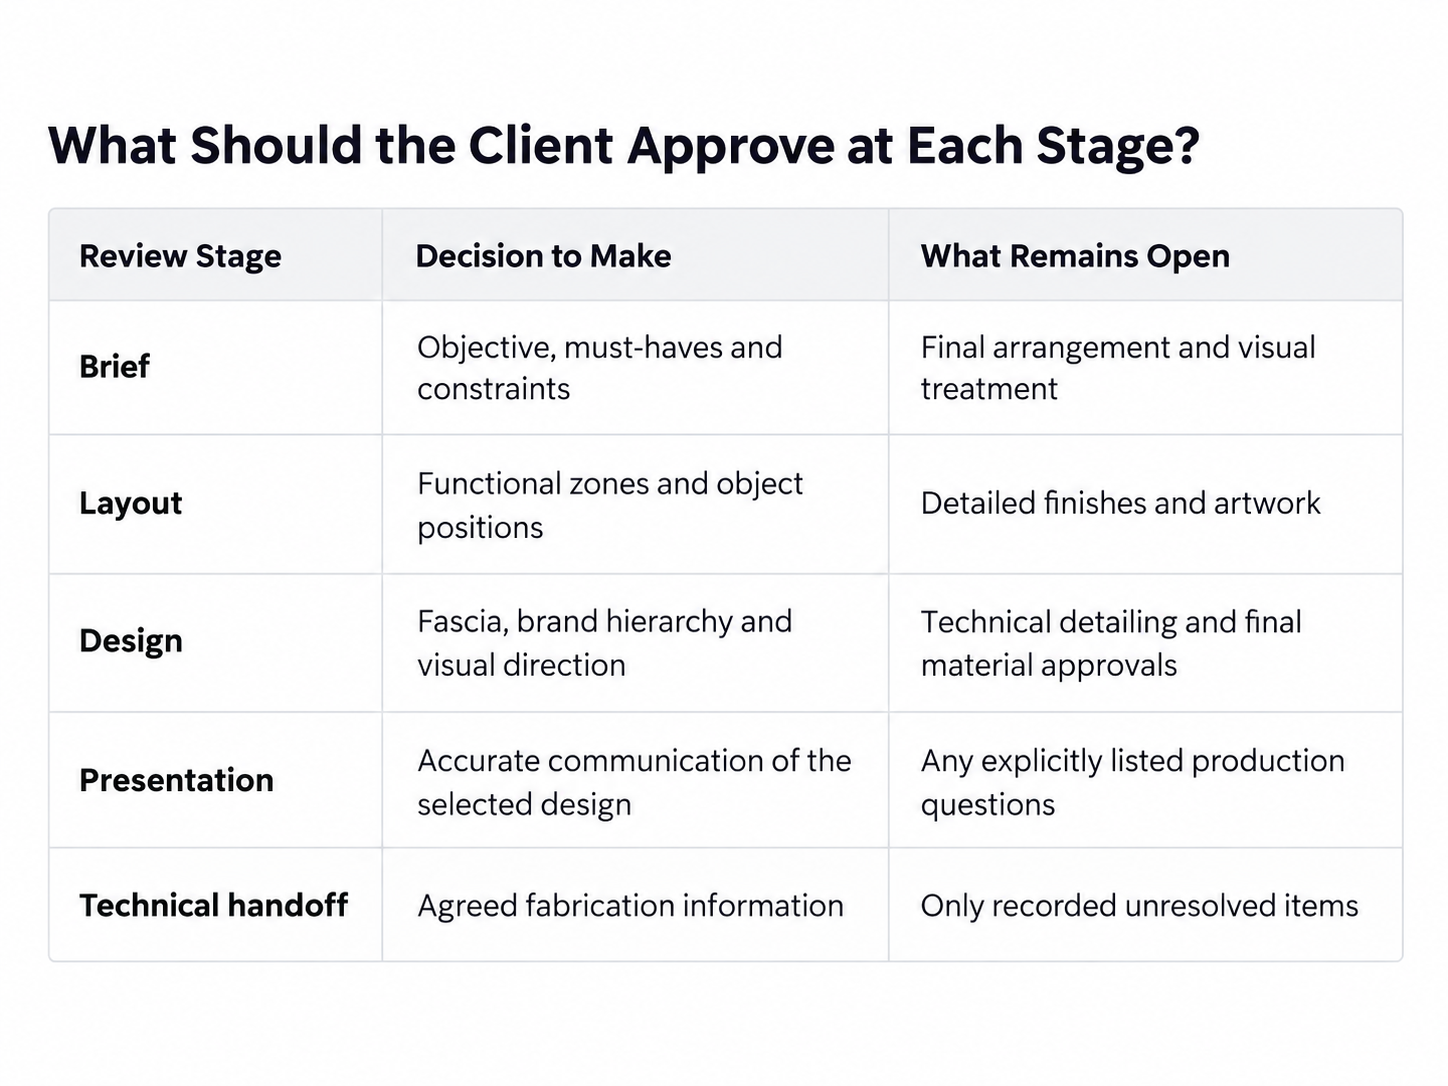
This is a suggested review structure rather than a mandatory industry standard. The exact approval process should be adapted to the project, client and fabrication workflow.
What Information Should Follow the Approved Model?
Keep the important project information together.
This can include:
- Original brief
- Approved design revision
- Key measurements
- Artwork status
- Selected materials or intended finishes
- Outstanding questions
- Remaining approvals
- Production responsibilities
A workflow such as SketchUp LayOut shows how a 3D model can be communicated through a separate documentation set. The broader lesson is that the 3D model should not automatically be treated as the complete production document.
Boothlane supports OBJ and FBX import and export, allowing models to move into compatible downstream 3D workflows. Before production, exported files should be tested and the team should agree on who is responsible for adding the technical information required for fabrication.
Check the Space Budget Before Choosing Finishes
The fictional stall in this example measures:
6 m × 3 m = 18 m²
Suppose: Storage occupies 2 m². Two display units occupy 2 m² together. The demonstration counter occupies another 1 m².
Those assumed objects use:
2 + 2 + 1 = 5 m²
That leaves:
18 - 5 = 13 m²
But that does not mean there are 13 square metres of spare space. The remaining area still needs to accommodate people, meeting furniture, door movement, staff access and circulation. Its shape matters just as much as its size. A narrow strip behind a display cannot automatically perform the same function as an open area near the entrance.
Use the calculation to ask better questions. Does storage really need that much space? Can one display be repositioned? Should the conversation area sit beside the demonstration zone or further away? A 3D model makes these alternatives easier to test without changing real product dimensions simply to make the layout fit.
Frequently Asked Questions
Should a Designer Follow Every Reference Image Literally?
No. Reference images should help communicate the intended look, mood or function. The final design still needs to work within the actual footprint, project objectives and exhibition rules. Any important differences between the reference and proposed design should be made clear during review.
How Many Concepts Should Follow an Exhibition Brief?
Enough to compare genuinely different solutions. A small number of purposeful options is usually more useful than many cosmetic variations that avoid the main design decision.
What Should Happen When the Brief Changes?
Update the requirement record first. Then identify which previously approved decisions are affected by the change. A changed brief should not automatically be treated as a minor rendering revision if it affects the layout, functionality or visitor experience.
Is This a Recommended Layout for Every 18 m² Stall?
No. The 18 m² corner booth used here is only an illustrative example. Actual stall design depends on the booked footprint, open sides, products, visitor requirements, staffing, objectives and event regulations.
Make the Brief Visible in 3D
A good exhibition brief should not remain a list of requirements sitting in a document. Those requirements need to become visible decisions about layout, branding, product placement and visitor experience.
Boothlane by EaseMyExpo lets teams turn those requirements into an editable 3D stall, review different design decisions and present the final direction more clearly before fabrication begins.